


How to Stage an Occupied Home for a Better Sale
A lived-in home can still make a powerful first impression. Learning how to stage an occupied home is less about making it look empty and more about helping buyers see the property’s best features without feeling like they are stepping into someone else’s daily routine. The goal is a polished, welcoming environment that feels spacious, elevated, and ready for its next chapter.
For sellers, this requires a thoughtful balance. The home needs to remain functional for family life, work, pets, and everyday schedules, while photographs, showings, and open houses need to reflect the standard buyers expect at the property’s price point. With a strategic plan, occupied staging can protect that balance while supporting stronger interest and premium perceived value.
How to Stage an Occupied Home Without Disrupting Life
Occupied staging starts with an honest assessment of what buyers will notice in the first 10 seconds. They will register light, layout, scale, cleanliness, storage, and overall condition before they consider the details of the home. A well-loved space may have excellent bones, but crowded surfaces, oversized furniture, personal collections, and inconsistent décor can make it feel smaller or less valuable than it is.
The first priority is editing. This does not mean stripping the home of all personality. It means removing the items that compete with the property itself. Buyers should notice the fireplace, not the cords below the television. They should see the generous kitchen counter space, not the coffee machine, school papers, and daily appliances.
Begin by packing anything that will eventually move with you: excess books, seasonal clothing, duplicate kitchenware, hobby supplies, collectibles, extra chairs, and décor that does not suit the room. This early packing step creates two benefits at once. It reduces visual clutter for showings and gives the household a practical head start on moving day.
A useful rule is to leave enough in each room to communicate purpose and comfort, but not so much that buyers need to mentally clear the space before imagining their own furniture there.
Start With the Rooms That Sell the Home
Not every room carries equal weight in a buyer’s decision. In most GTA listings, the entry, principal living space, kitchen, primary bedroom, and bathrooms deserve the strongest attention because they shape the listing photos and the emotional experience of a showing.
Create a calm, intentional entry
The entry should feel open and easy to navigate. Remove extra shoes, sports equipment, mail piles, pet accessories, and outerwear from sight. A simple bench, a well-proportioned mirror, fresh greenery, or a restrained console vignette can make the arrival feel considered without taking up valuable floor space.
If the entry is compact, avoid forcing furniture into it. Clean lines, bright walls, good lighting, and one elevated finishing detail often do more than additional décor.
Make the living room feel generous
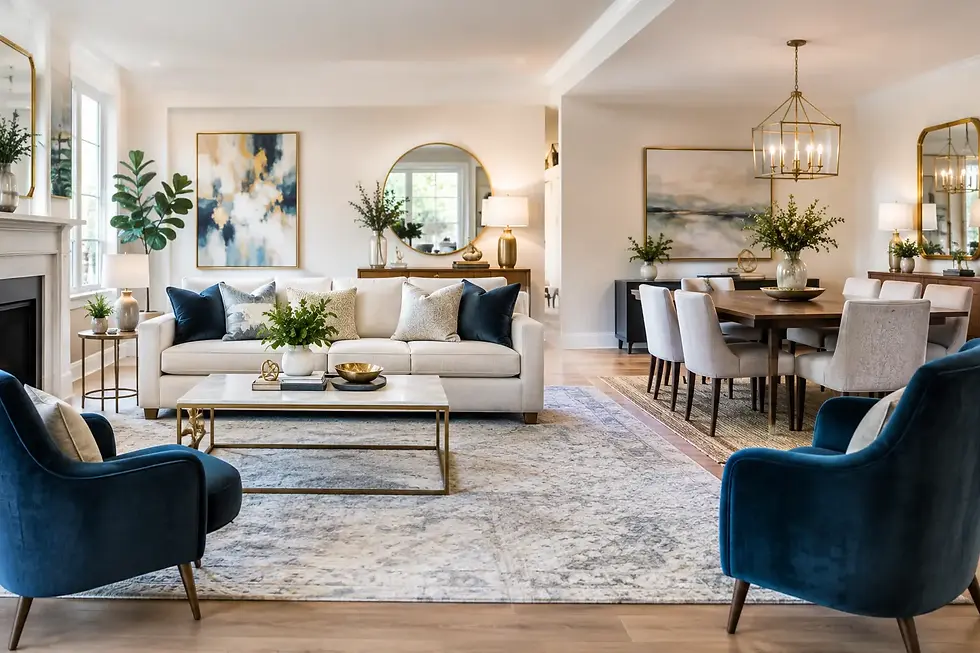
Living rooms often become the family’s storage zone, office, entertainment area, and relaxation space all at once. For sale, simplify the room back to its primary function. Remove bulky recliners, extra side tables, surplus throw pillows, and furniture that interrupts the natural path through the space.
This is where furniture rental can make a meaningful difference. Replacing one oversized sofa or mismatched chair with scaled, cohesive pieces can improve the room’s flow, create better sightlines, and bring a more luxury-focused feel to photographs. The right furniture plan can also help buyers understand an awkward layout or a large open-concept area.
Let the kitchen read as clean and capable
Kitchens sell lifestyle, but they need to feel practical as well as attractive. Clear counters as much as possible, keeping only a few intentional elements such as a sculptural bowl, a small plant, or a neatly styled tray. Store dish racks, cleaning products, pet food, magnets, and countertop appliances that are not used every day.
Cabinets and drawers matter in an occupied home because buyers may open them. Aim for breathing room rather than perfection. A partly full pantry and organized drawers signal useful storage. Overflowing cupboards signal that the home may not have enough of it.
Turn bedrooms into retreats
A primary bedroom should feel like a private retreat rather than a multi-purpose storage room. Fresh neutral bedding, layered pillows, coordinated nightstands, and clear floor space can quickly change its perceived quality. Remove laundry baskets, visible charging cables, personal photographs, and exercise equipment if possible.
Children’s bedrooms do not need to look anonymous, but they should appear spacious and easy to maintain. Limit toys to a small, tidy display and store the rest in closed bins. For a nursery, soft textiles and a clean layout are more effective than heavily themed décor.
Depersonalize Without Making the Home Cold
One of the common mistakes in occupied staging is removing every trace of warmth. Buyers want to picture themselves in the home, but they also want to feel something when they walk through it. The answer is selective depersonalization.
Pack family photos, highly specific artwork, religious items, political messaging, and collections that dominate a room. Then replace them with broadly appealing details: art with calm colour palettes, fresh flowers, textured cushions, a simple table setting, or a neatly made bed. These elements suggest an aspirational lifestyle without asking buyers to connect with the seller’s personal story.
Colour should be handled with similar restraint. A bold accent wall may work beautifully for daily living but can distract in listing photography. Neutral does not have to mean bland. Warm whites, layered taupes, soft greys, natural wood tones, and carefully selected black accents can create depth while appealing to a wide buyer pool.
Build a Showing-Ready Routine That Works
The difference between successful occupied staging and a stressful sale is usually routine. Sellers need a plan that can be completed quickly before a showing request, particularly in active markets where a buyer may want to visit with little notice.
Set up one concealed basket or bin for each major living area. Before leaving for a showing, use it to collect everyday items such as remotes, chargers, mail, children’s toys, toiletries, and pet supplies. These baskets can be placed in a vehicle, a closed closet, or a designated storage area during the appointment.
A workable showing checklist should cover the following:
Make beds and place laundry out of sight.
Clear kitchen and bathroom counters.
Empty garbage and remove pet items.
Open blinds and turn on selected lamps.
Wipe visible surfaces and do a quick floor check.
Leave the home with a clean, neutral scent.
Avoid strong candles, plug-ins, or cooking smells just before a showing. Fresh air and a clean home are more persuasive than fragrance. If pets live in the home, arrange for them to be out during showings whenever possible, and be especially attentive to fur, litter, bedding, and food bowls.
Know When to Keep, Store, or Replace Furniture
The right decision depends on the quality, condition, and scale of the existing furnishings. A newer, well-maintained home with cohesive furniture may need editing and styling rather than a full staging installation. A property with worn upholstery, dark oversized pieces, or several mismatched styles may benefit from storing selected items and introducing rental furniture that better supports the listing strategy.
This is particularly valuable for luxury homes, vacant rooms, and spaces with challenging proportions. A professionally selected furniture plan can define a dining area, create a purposeful home office, or make a large bedroom feel balanced rather than empty. It also ensures that the visual standard remains consistent across photographs, video, showings, and open houses.
At StagingPro, the most effective occupied-home plans are tailored around what can stay, what should be packed, and where custom-selected furnishings will create the greatest visual return. This approach keeps the process practical for the seller while presenting the home with the polish buyers expect.
Do Not Hide Condition Issues With Styling
Staging enhances a home’s strengths, but it cannot replace necessary maintenance. Buyers will notice peeling paint, damaged flooring, outdated light fixtures, loose hardware, stained grout, and worn caulking. In many cases, modest repairs offer a stronger return than adding more accessories.
Walk through the property as if you were seeing it for the first time. Look from the doorway of each room, then look down at the floors, up at the ceilings, and closely at high-touch surfaces. Replace burnt-out bulbs, repair obvious defects, and address anything that could suggest neglect. A polished presentation depends on both styling and condition.
Treat Photography as Part of the Staging Plan
A home can look attractive in person but underperform online if the staging was not planned for photography. Camera angles reveal clutter on counters, awkward furniture placement, gaps in a room’s layout, and inconsistent colour choices more clearly than the eye often does.
Before photography, stand at the likely doorway angle and assess what will be visible in the frame. Remove items that cut across sightlines, make sure curtains hang evenly, and avoid placing furniture too tightly against every wall. Small adjustments can make rooms appear brighter, more balanced, and more substantial in the listing.
An occupied home does not need to become a showroom for weeks at a time. It needs a clear presentation strategy, thoughtful editing, and a reliable reset routine. When daily life is controlled rather than visible, buyers have more room to focus on the space, the lifestyle, and the value they can see themselves gaining.


Comments